7. Adding Authentication
Most modern apps need a way to create and authenticate users. Wasp makes this as easy as possible with its first-class auth support.
To add users to your app, you must:
- Create a
UserEntity. - Tell Wasp to use the Username and Password authentication.
- Add login and signup pages.
- Update the main page to require authentication.
- Add a relation between
UserandTaskentities. - Modify your Queries and Actions so users can only see and modify their tasks.
- Add a logout button.
Creating a User Entity
Since Wasp manages authentication, it will create the auth related entities for you in the background. Nothing to do here!
You must only add the User Entity to keep track of who owns which tasks:
// ...

model User {
  id Int @id @default(autoincrement())
}
Adding Auth to the Project
Next, tell Wasp to use full-stack authentication:
app TodoApp {
  wasp: {
    version: "^0.17.0"
  },
  title: "TodoApp",
  head: [
    "<link rel='icon' href='/favicon.ico' />",
  ],
  auth: {
    // Tells Wasp which entity to use for storing users.
    userEntity: User,
    methods: {
      // Enable username and password auth.
      usernameAndPassword: {}
    },
    // We'll see how this is used in a bit.
    onAuthFailedRedirectTo: "/login"
  }
}

// ...
Don't forget to update the database schema by running:
wasp db migrate-dev
By doing this, Wasp will create:
- Auth UI with login and signup forms.
- A
logout()action. - A React hook
useAuth(). context.userfor use in Queries and Actions.
Adding Login and Signup Pages
Wasp creates the login and signup forms for us, but we still need to define the pages to display those forms on. We'll start by declaring the pages in the Wasp file:
// ...

route SignupRoute { path: "/signup", to: SignupPage }
page SignupPage {
  component: import { SignupPage } from "@src/SignupPage"
}

route LoginRoute { path: "/login", to: LoginPage }
page LoginPage {
  component: import { LoginPage } from "@src/LoginPage"
}
Great, Wasp now knows these pages exist!
Here's the React code for the pages you've just imported:
- JavaScript
- TypeScript
import { Link } from "react-router-dom";
import { LoginForm } from "wasp/client/auth";

export const LoginPage = () => {
  return (
    <div style={{ maxWidth: "400px", margin: "0 auto" }}>
      <LoginForm />
      <br />
      <span>
        I don't have an account yet (<Link to="/signup">go to signup</Link>).
      </span>
    </div>
  );
};
The signup page is very similar to the login page:
- JavaScript
- TypeScript
import { Link } from "react-router-dom";
import { SignupForm } from "wasp/client/auth";

export const SignupPage = () => {
  return (
    <div style={{ maxWidth: "400px", margin: "0 auto" }}>
      <SignupForm />
      <br />
      <span>
        I already have an account (<Link to="/login">go to login</Link>).
      </span>
    </div>
  );
};
Update the Main Page to Require Auth
We don't want users who are not logged in to access the main page, because they won't be able to create any tasks. So let's make the page private by requiring the user to be logged in:
// ...

page MainPage {
  authRequired: true,
  component: import { MainPage } from "@src/MainPage"
}
Now that auth is required for this page, unauthenticated users will be redirected to /login, as we specified with app.auth.onAuthFailedRedirectTo.
Additionally, when authRequired is true, the page's React component will be provided a user object as prop.
- JavaScript
- TypeScript
export const MainPage = ({ user }) => {
  // Do something with the user
  // ...
};
import type { AuthUser } from "wasp/auth";

export const MainPage = ({ user }: { user: AuthUser }) => {
  // Do something with the user
  // ...
};
Ok, time to test this out. Navigate to the main page (/) of the app. You'll get redirected to /login, where you'll be asked to authenticate.
Since we just added users, you don't have an account yet. Go to the signup page and create one. You'll be sent back to the main page where you will now be able to see the TODO list!
Let's check out what the database looks like. Start the Prisma Studio:
wasp db studio
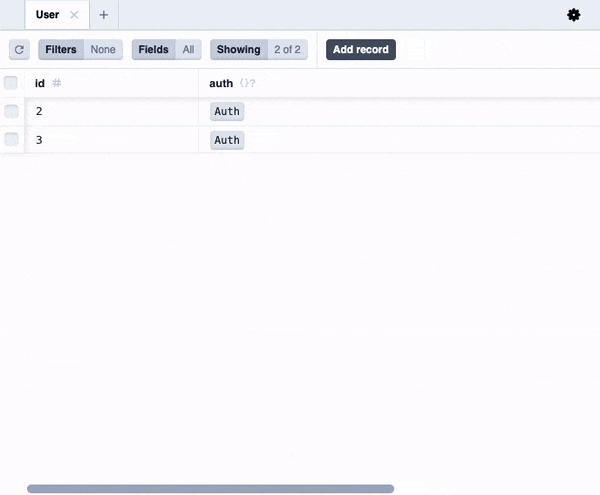
You'll notice that we now have a User entity in the database alongside the Task entity.
However, you will notice that if you try logging in as different users and creating some tasks, all users share the same tasks. That's because you haven't yet updated the queries and actions to have per-user tasks. Let's do that next.
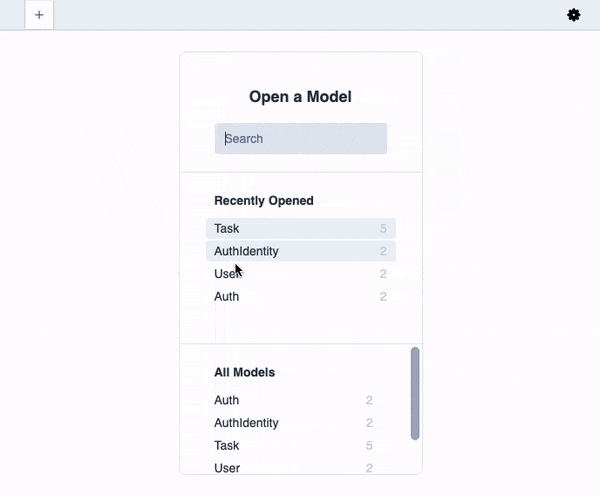
You might notice some extra Prisma models like Auth, AuthIdentity and Session that Wasp created for you. You don't need to care about these right now, but if you are curious, you can read more about them here.
Defining a User-Task Relation
First, let's define a one-to-many relation between users and tasks (check the Prisma docs on relations):
// ...

model User {
  id    Int    @id @default(autoincrement())
  tasks Task[]
}

model Task {
  id          Int     @id @default(autoincrement())
  description String
  isDone      Boolean @default(false)
  user        User?   @relation(fields: [userId], references: [id])
  userId      Int?
}
As always, you must migrate the database after changing the Entities:
wasp db migrate-dev
We made user and userId in Task optional (via ?) because that allows us to keep the existing tasks, which don't have a user assigned, in the database.
This isn't recommended because it allows an unwanted state in the database (what is the purpose of the task not belonging to anybody?) and normally we would not make these fields optional.
Instead, we would do a data migration to take care of those tasks, even if it means just deleting them all. However, for this tutorial, for the sake of simplicity, we will stick with this.
Updating Operations to Check Authentication
Next, let's update the queries and actions to forbid access to non-authenticated users and to operate only on the currently logged-in user's tasks:
- JavaScript
- TypeScript
import { HttpError } from "wasp/server";

export const getTasks = async (args, context) => {
  if (!context.user) {
    throw new HttpError(401);
  }
  return context.entities.Task.findMany({
    where: { user: { id: context.user.id } },
    orderBy: { id: "asc" },
  });
};
import type { Task } from "wasp/entities";
import { HttpError } from "wasp/server";
import type { GetTasks } from "wasp/server/operations";

export const getTasks: GetTasks<void, Task[]> = async (args, context) => {
  if (!context.user) {
    throw new HttpError(401);
  }
  return context.entities.Task.findMany({
    where: { user: { id: context.user.id } },
    orderBy: { id: "asc" },
  });
};
- JavaScript
- TypeScript
import { HttpError } from "wasp/server";

export const createTask = async (args, context) => {
  if (!context.user) {
    throw new HttpError(401);
  }
  return context.entities.Task.create({
    data: {
      description: args.description,
      user: { connect: { id: context.user.id } },
    },
  });
};

export const updateTask = async (args, context) => {
  if (!context.user) {
    throw new HttpError(401);
  }
  return context.entities.Task.updateMany({
    where: { id: args.id, user: { id: context.user.id } },
    data: { isDone: args.isDone },
  });
};
import type { Task } from "wasp/entities";
import { HttpError } from "wasp/server";
import type { CreateTask, UpdateTask } from "wasp/server/operations";

type CreateTaskPayload = Pick<Task, "description">;

export const createTask: CreateTask<CreateTaskPayload, Task> = async (
  args,
  context,
) => {
  if (!context.user) {
    throw new HttpError(401);
  }
  return context.entities.Task.create({
    data: {
      description: args.description,
      user: { connect: { id: context.user.id } },
    },
  });
};

type UpdateTaskPayload = Pick<Task, "id" | "isDone">;

export const updateTask: UpdateTask<
  UpdateTaskPayload,
  { count: number }
> = async (args, context) => {
  if (!context.user) {
    throw new HttpError(401);
  }
  return context.entities.Task.updateMany({
    where: { id: args.id, user: { id: context.user.id } },
    data: { isDone: args.isDone },
  });
};
Due to how Prisma works, we had to convert update to updateMany in updateTask action to be able to specify the user id in where.
With these changes, each user should have a list of tasks that only they can see and edit.
Try playing around, adding a few users and some tasks for each of them. Then open the DB studio:
wasp db studio
You will see that each user has their tasks, just as we specified in our code!
Logout Button
Last, but not least, let's add the logout functionality:
- JavaScript
- TypeScript
// ...
import { logout } from "wasp/client/auth";
//...

const MainPage = () => {
  // ...
  return (
    <div>
      {/* ... */}
      <button onClick={logout}>Logout</button>
    </div>
  );
};
// ...
import { logout } from "wasp/client/auth";
//...

const MainPage = () => {
  // ...
  return (
    <div>
      {/* ... */}
      <button onClick={logout}>Logout</button>
    </div>
  );
};
This is it, we have a working authentication system, and our Todo app is multi-user!
What's Next?
We did it 🎉 You've followed along with this tutorial to create a basic Todo app with Wasp.
You should be ready to learn about more complicated features and go more in-depth with the features already covered. Scroll through the sidebar on the left side of the page to see every feature Wasp has to offer. Or, let your imagination run wild and start building your app! ✨
Looking for inspiration?
- Get a jump start on your next project with Starter Templates.
- Check out our official examples.
- Make a real-time app with Web Sockets.
If you notice that some of the features you'd like to have are missing, or have any other kind of feedback, please write to us on Discord or create an issue on Github, so we can learn which features to add/improve next 🙏
If you would like to contribute or help to build a feature, let us know! You can find more details on contributing here.
Oh, and do subscribe to our newsletter! We usually send one per month, and Matija does his best to unleash his creativity to make them engaging and fun to read :D!